
Hey Guys!
Hope everyone had a delicious Thanksgiving with friends & family! I haven’t posted in a few days due to the holiday & then working the holiday weekend, so I decided to share with you one of my favorite first timer dresser redo! Hope you enjoy & have a great week back at work!
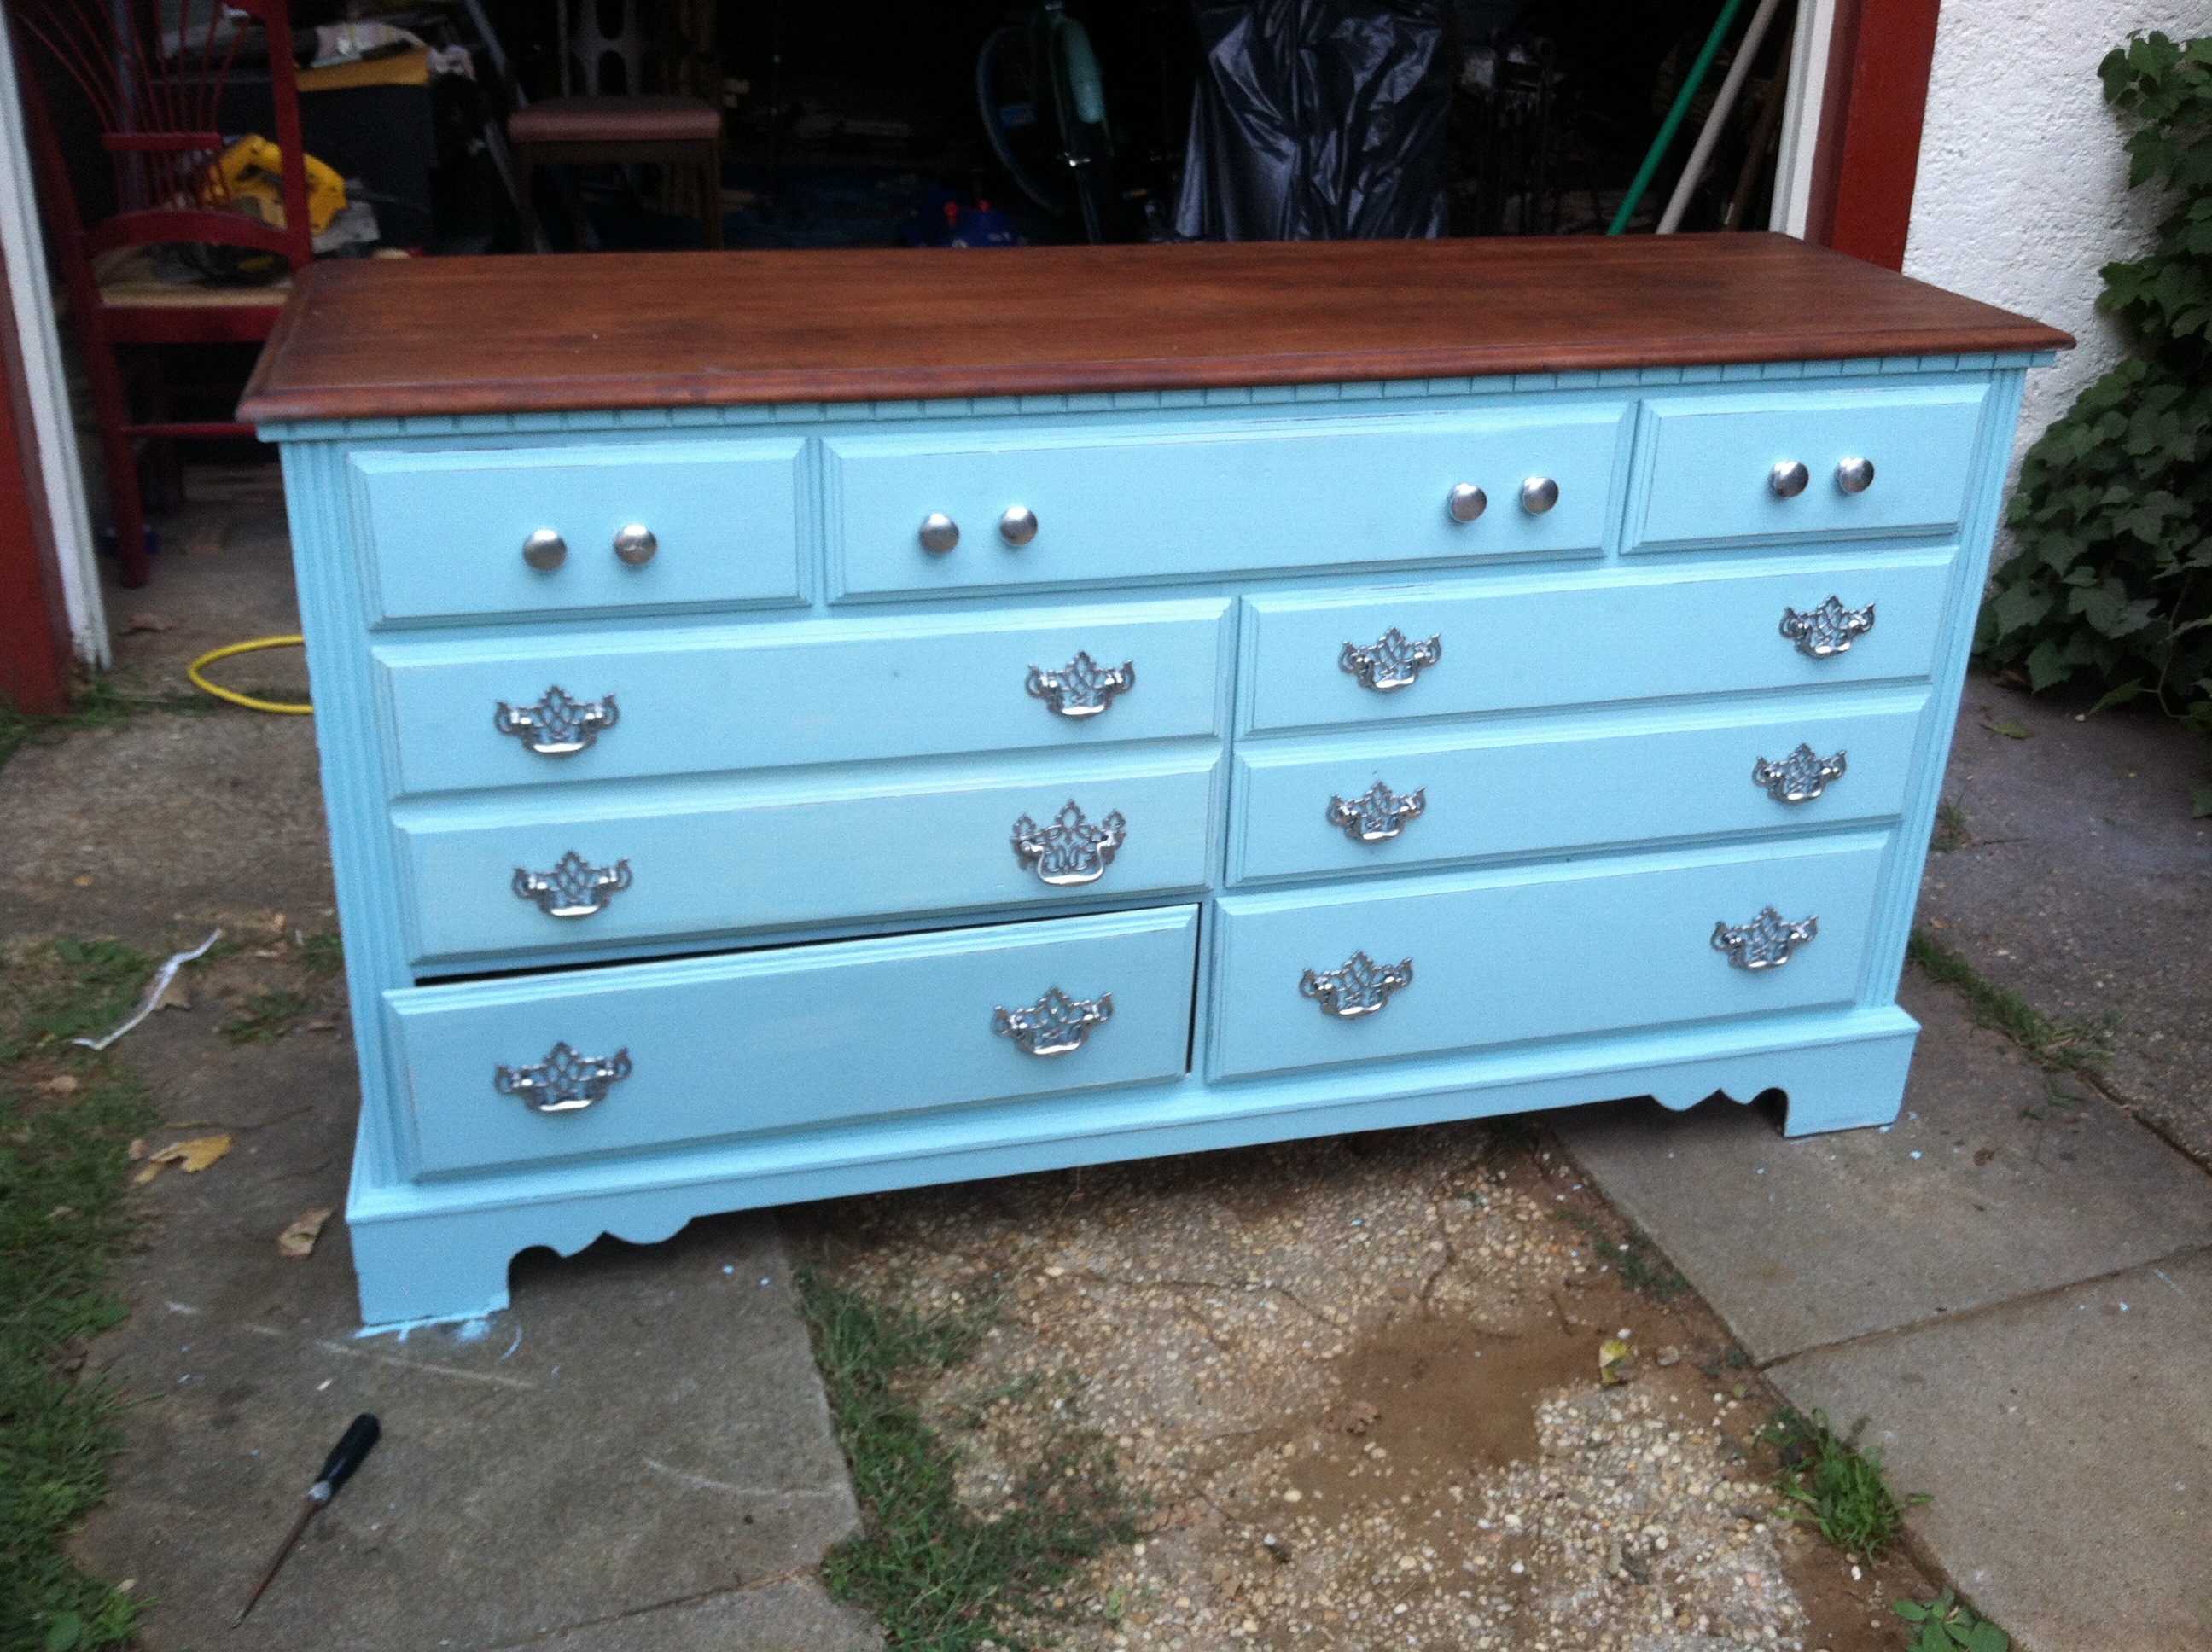
Once again, My mom and I of course went thrift store shopping for furniture for my first apt and stumbled upon a great long 7 drawer dresser! Back then, we painted every piece of furniture BLACK-the color I hate the most now on furniture! In Hoboken I was craving to paint so I brought each drawer onto the fire escape and painted it cream…it looked cute and clumsy me somehow didn’t fall off the 1ft X 1ft fire escape….I couldn’t paint the top or sides of the dresser because it was winter and I didn’t want to freeze us out of the building or suffocate us to death….so it was half done for a year. Now that I have my fabulous backyard and garage for revamping my wonderful garbage pieces, I went straight to tackling this dresser! I didn’t know I was starting a blog at the time, so this is my best before picture..
I started by sanding down the top, using 60 grit sandpaper & my good ol’ power sander passed onto me by my mom. (If you’re a DIYER, you know that this is the best gift a mom could pass onto her daughter!). Let me tell you, sanding that top took me TWO WEEKS! Granted, I work full time as a nurse and during this project which I decided to do on a whim, we also were fully gutting our kitchen ourselves. Yet somehow, I got it done. When I originally painted it black we had also primed it, and apparently that primer was badass! So I sanded & sanded & sanded …..TIP: When you’re sanding furniture you ALWAYS want to go with the grain of the wood, otherwise you’ll mess up the original wood. My grain was lengthwise.Press firmly down on the sander and sand in long strokes over and over. I notice it’s easier to chip away at the paint if you go over one section a bunch of times. For the edges of the top, the molding was a B*otch to get at. I had to use the 60 grit paper by hand and sand inch by inch to get rid of the black. When I noticed the wood appearing I’d use an old cloth & wipe away the dust & keep sanding. Once all the paint/primer was gone, I used a damp old cloth & got rid of all the sawdust. Finishing the top: I stained the top with my favorite walnut stain (which I used on our dining room table-see older post). Theres many ways to stain a piece of furniture-but my favorite way is to use an old cloth and just “Slop” it onto the piece, and swirl it around. You want to make sure you cover every inch of the surface, wait 15minutes & wipe away the excess. If you want it darker then you just repeat the process until you have the desired darkness you want. I did two coats. I knew that this dresser would be with my husbands “stuff” so I waxed the top as well. This was my first time using the wax and at first I hated it. I used MINWAX…it was hard-literally. I used an old rag again and kind of dug into the wax and rubbed it onto the entire surface. I wasn’t sure what was going to be the results, but you gotta’ learn somehow! I actually love the finished look! It’s not too glossy but it won’t scratch and it feels smooth!
Next I tackled the rest of the dresser.
I took out all of the drawers & took all of the handles off with a screwdriver. I then used primer and quickly primed the drawers and dresser (NOT the top obviously)! I let the primer dry for a day & the next day started painting! I used a very pale aqua. TIP: Because my dresser was already painted black, I didn’t need to rough up the wood. HOWEVER: if the wood is shiny you need to quickly hand sand it…to get rid of the shinyness and “rough” it up so the paint will stick to it! I gave the drawers & dresser two coats of my aqua paint (WHICH I LOVE) its the same aqua as the suitcase table (See prior post!). 
NEXT: I spray painted all the hardware silver. I gave it two coats. Only need to wait a few hours in between each coat (I don’t have patience). Screw the handles back on.

Lastly: I wanted a small amount of distressed look. So i hand sanded the sides of dresser lightly until i got the roughed up look I was looking for.
I think next time I’m going to use chalk paint tho…home made kind…so stay tuned!!! They say it distresses much more easily! Hope you guys like the piece!!!

Xoxo,
Amanda-Andy


Hi Amanda! Another quick question…:) What kind of sander do you have? It sounds like you like the one you have. I’ve never bought one but think I’m going to need it for refinishing my table.
Hi Abbie, Sorry for the delay! I am using my moms OLD OLD sander..its about 30 years old. However, there is a large variety at lowes and I do believe they all work great its more the matter of how you do your sanding!!!
No problem!! Sorry for my delay now! I am just getting back around to the project I was thinking of waaaay back in December. 🙂 I’ll take a look at Lowes for the sander!